总结一下如何把node-chatgpt-api和PandoraAI部署到Windows阿里云服务器上。
node-chatgpt-api就相当于是一个核心,控制AI回复你什么,PandoraAI就是一个网页UI程序。
本地部署node-chatgpt-api
首先,打开github这个项目主页,我写的这个东西你需要打开这个主页一起看才能看懂。
node-chatgpt-api
看不懂可以不看,我也没看懂。
看到那个Getting Started 部分,
Prerequisites是前提,你需要去下载npm,
Download | Node.js (nodejs.org),
自己根据自己的系统下载就行。很简单。
然后看Usage部分,不过我也不知道Module有啥用。但是就直接跟着代码下载了
(就在你的想部署这个node-chatgpt-api的文件夹下,打开命令行,输入这些命令。我用的是git bash Git - Downloads, 但是我不知道windows自带的命令行能不能用直接npm)
1 | npm i @waylaidwanderer/chatgpt-api |
API Server部分,我是直接看到他那个Alternatively的第二种方法了,第一种没搞会。
第一步
就在你的想部署这个node-chatgpt-api的文件夹下,打开命令行,输入这些命令。
1 | git clone https://github.com/waylaidwanderer/node-chatgpt-api |
第二步
把setting.example.js改名成setting.js,然后右键编辑,或者用文本编辑器或者其他编辑器打开。
大家想改的应该都是newbing,所以只说这一部分。
1 | // Options for the Bing client |
UserToken:
打开newbing
右键点这个检查
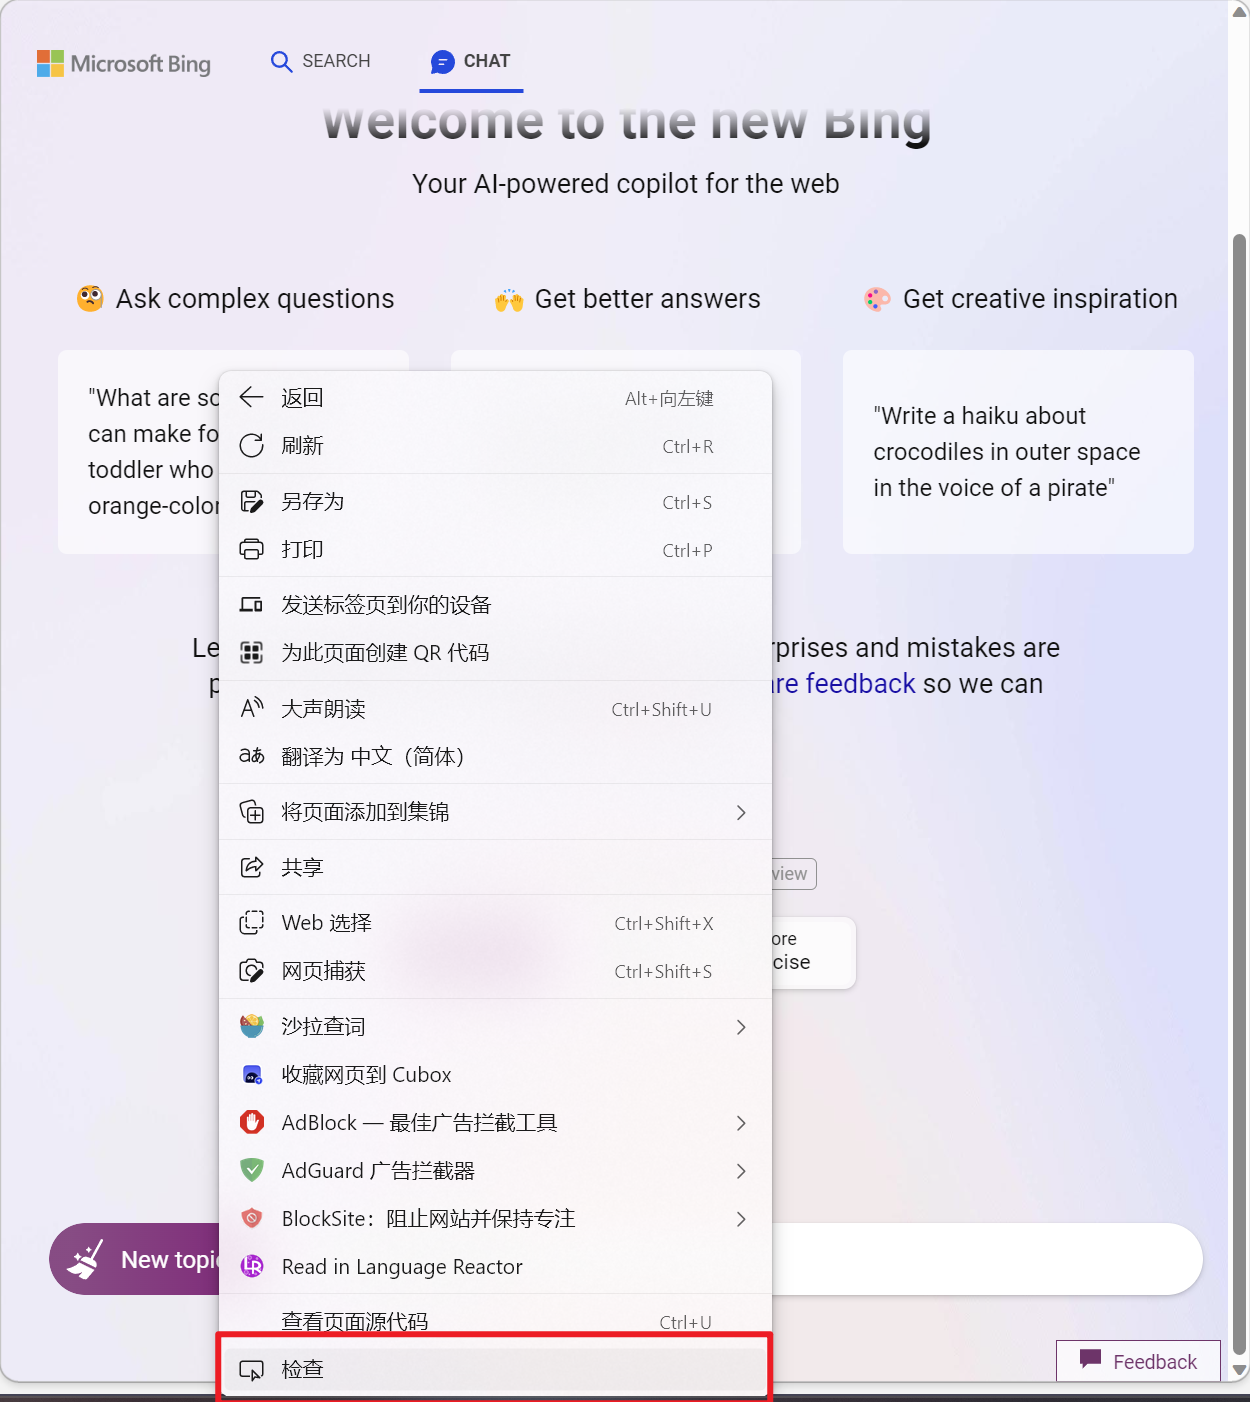
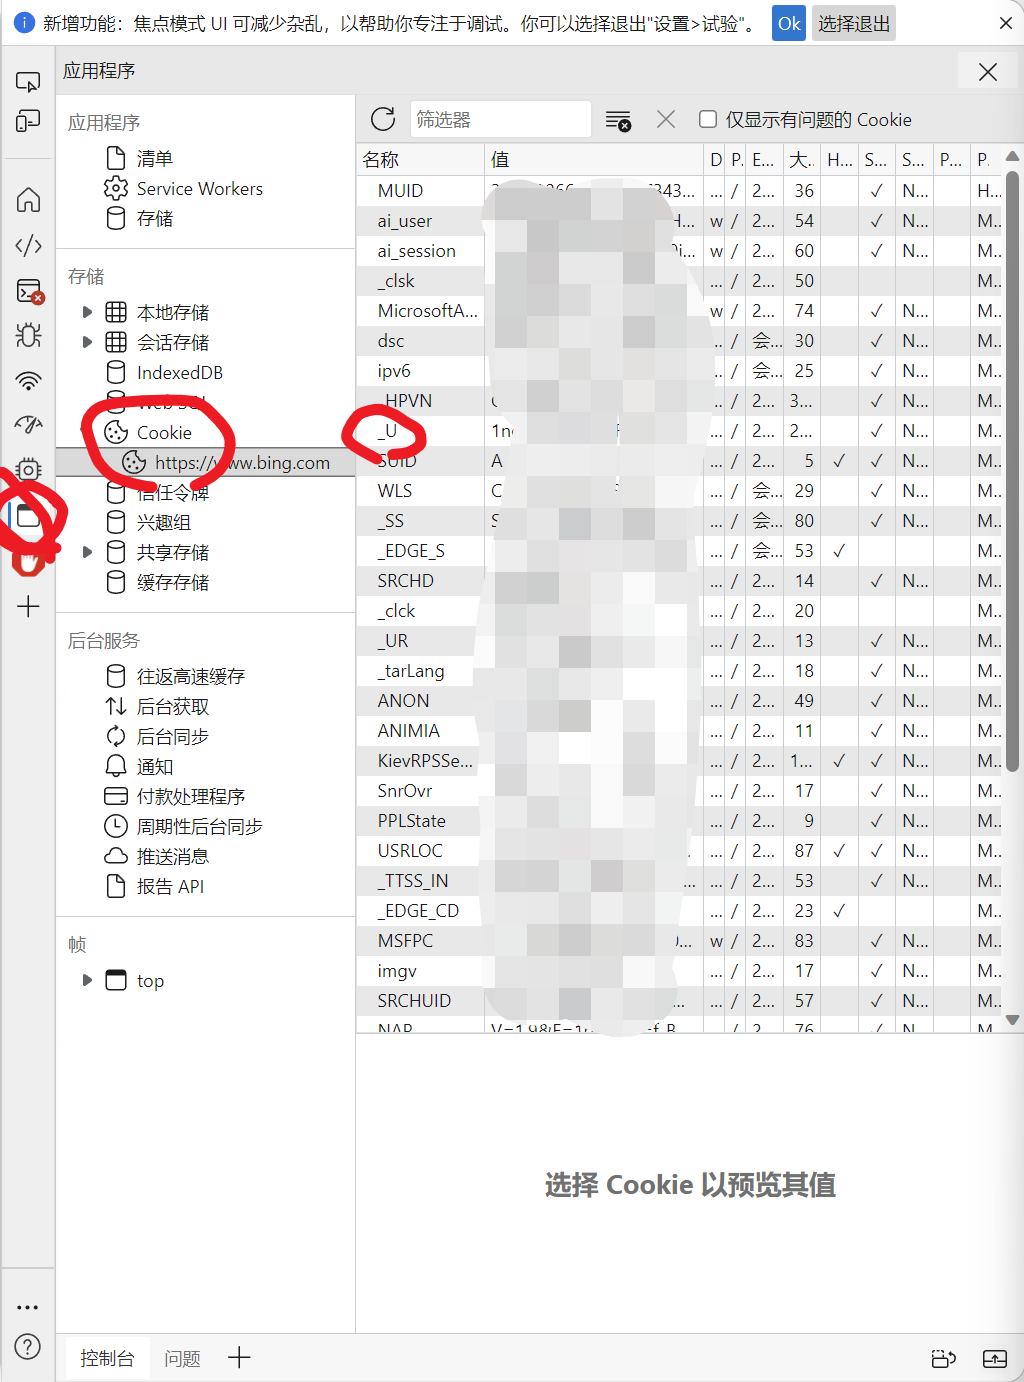
如图找到_U,把右边的值复制,就是你的userToken
vpn port
以clash for windows 为例,在这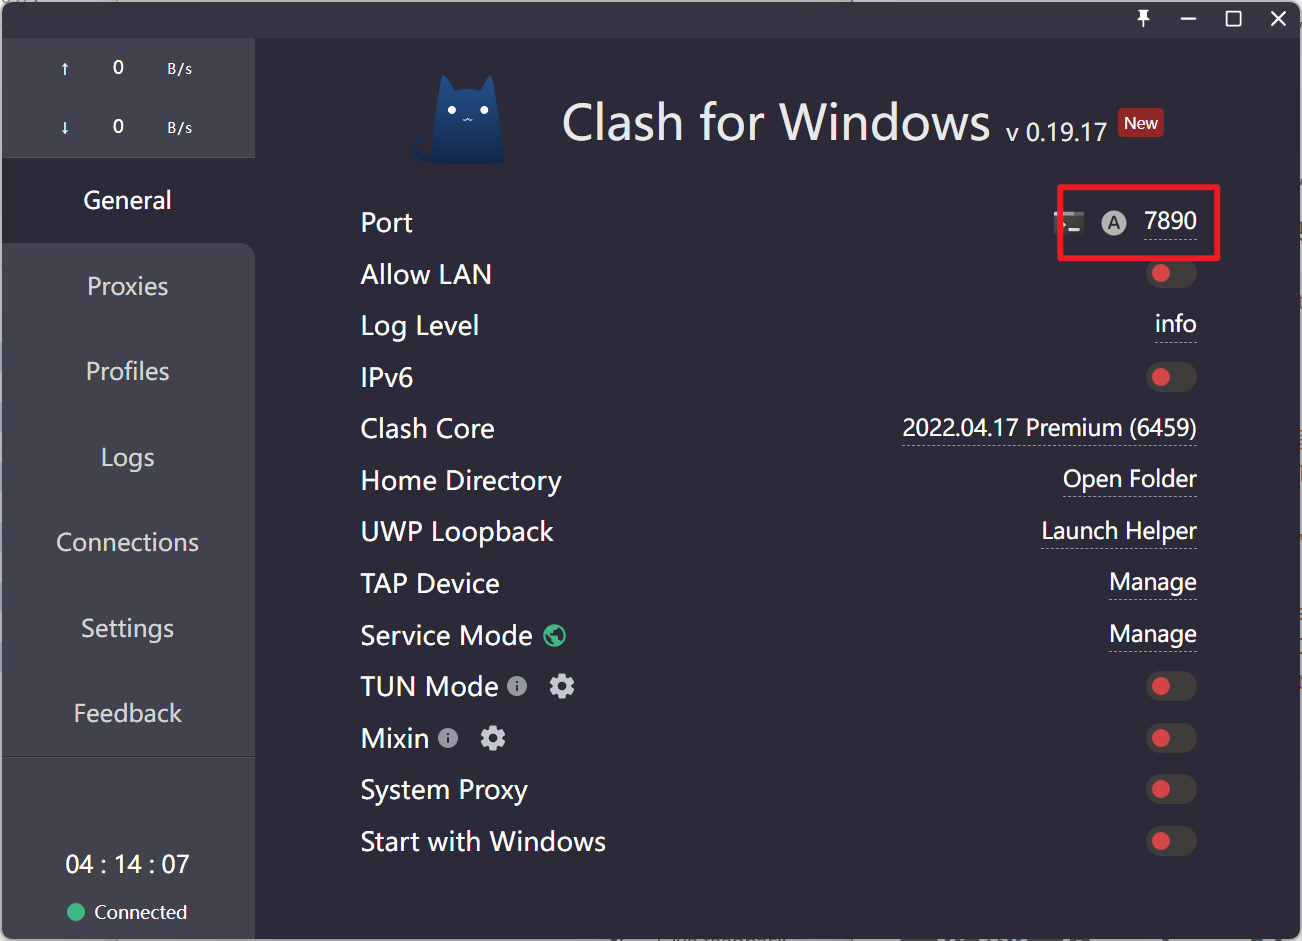
就设置好了,再最后
第三步
1 | npm start |
就相当于挂一个服务器了,别去关它。
本地部署PandoraAI
换一个文件夹。
第一步
1 | git clone https://github.com/waylaidwanderer/PandoraAI.git |
第二步
改名,把.env.example 改成.env
第三步
1 | npm run dev |
然后它终端应该就会输出告诉你你能从哪个网址登上去。一般就是默认
这样本地部署就ok了
部署到服务器
其实大差不差,我用的是windows镜像,所以前面的步骤都是一样。要更改的就是nuxt的一点设置,以及代理的一点设置。
setting.js
上面bing的那个proxy不用管,和本地的一样就行。
在node-chatgpt-api的setting.js中要改的东西是:
把3000改成3001,
因为要弄到公网上去,你Pandora会占用3000这个端口,还是3000就重复了。
把下面host改成 ‘0.0.0.0’,
当然你直接改全局变量更好,不过我这样也能用。
1 | // Options for the API server |
.env
1 | API_BASE_URL=http://你的公网ip:3001 |
改成这个
(期间一个技巧来查看是否成功开辟端口就是netstat -oan 来看是否成功开辟。)
nuxt.config.js
最后加个
1 | server: { |
改完这三个文件之后。
你在node-chatgpt-api文件夹里,bash命令行
1 | npm start |
在PandoraAI文件夹里
打开package.json文件
改
1 | { |
也就是加一行
1 | “start”: "nuxt start", |
然后退出,在bash命令行
1 | npm run build |
防火墙
你要在你的阿里云或者什么云那设置防火墙,加这么一条,把3000/3001弄出来。

应该就好了。